
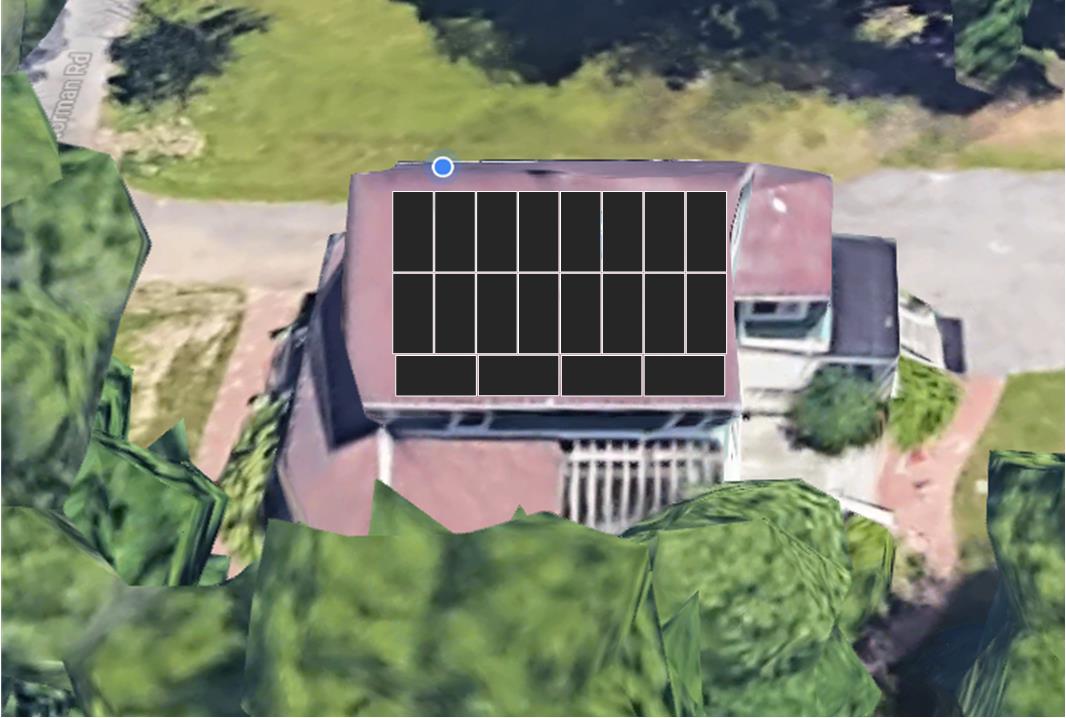
In an attempt to be more eco-friendly we have added solar! Our garage roof is of ideal size and orientation for our consumption. There are now 15 solar panels on the roof. It was chilly overcast spring morning when we started. I wanted to get them installed as early in spring as possible to get a full season of sunlight. The next day the sky had cleared and the sun was shining bright on a crisp blue background. I threw the switch on the inverter and powered up the system and the capacitors started to hum. The digital readout jumped immediately to 4.5+ kW I ran to the meter and it was spinning backwards and at a relatively decent pace.
The solar array will supply 99+ percent of our yearly power consumption. The summer months the array will over produce and excess will be fed back to the grid and during the winter months we will need to pull from the grid. This net-meter method will hopefully result in a zero sum or better to provide enough power yearly.
Geotherm is a Honeoye Falls, NY based company managed the installation of the system. The installation began April 17 and was completed April 18. The 5kW array will produce enough energy to power my home and, most importantly, reduce the carbon footprint of beekeeping and ultimately honey. I was lucky enough to be able to work closely with the Geotherm folks and assist a bit with the install.
Day one was wiring and roof mounts. Glen showed up at 8:30 and we got right to work. I had cleaned up the garage a bit over the previous few days and had the plywood up ready for mounting. I started on mounting the inverter as Glen started preparing for the roof mount install. The inverter has a hinge mounting system which makes mounting incredibly easy and I had it mounted in about 10 minutes. The most important piece of the inverter install is aligning and leveling the mounting bracket. The inverter is a Fronius Primo 5.0-1 208-240 and is Wi-Fi ready and includes free on line monitoring. My goal is to have a real-time graph up on the site shortly.
Once the inverter was mounted I started helping Glen with the roof mounts. We made short work of it as the longest part of the installation was proper alignment. Glen had the marked up the roof for installation we started on the rails. We drilled the lower row of guide holes and mounted the L-brackets and then attached the bottom of each rail to the first bracket then worked our way up. As Glen then did the final alignment and securing of the rails. A new 30 amp breaker was installed in the garage circuit box farthest from the main to dissipate any heat across maximum surface area. I had the inverter wired into the breaker panel in about 30 mins.
I am now in the market for a PHEV and the installation of solar power is another step in our goal to become more sustainable and by reducing our carbon emissions and hopefully somewhat mitigating our environmental impact. I will continue to look at new innovations that will reduce our dependence on fossil fuels.


